Documentation

ArrowHiTech Jsc is one of the Vietnamese leading IT outsourcing companies which puts high-quality services and customer’s satisfaction our top priorities. Since our establishment in 2007, we have increasingly widened our skills and our professional experience so as to meet all the demands of the customer all over the world with our dedicated services focusing on Web design & development, Extension/ Theme building, Mobile applications/ Games development and Internet marketing.

Version: 1.0 Author: ArrowHiTech. Designed by: ArrowHiTech

1.1 Welcome to Gymax

We would like to thank you for choosing Gymax. Gymax is also based on Elementor  and Elementor Pro. So, it is an assurance that Gymax will bring you a super powerful features of Elementor. You won’t make any mistake here, because our detailed documentation will guide you. If you are unable to find your answer in this documentation, don’t hesitate to sign up & submit a support ticket here: “SUPPORT“.

1.2 Template Requirements

You can click “HERE” to find out more about requirements of WordPress.

You also need to make sure that your host can comply with follow requirements.

  1. Your web host has the minimum requirements to run WordPress.
  2. Your host is running the latest version of WordPress.
  3. You can download the latest release of WordPress from official “WordPress” website.
  4. Always create secure passwords for FTP and Database.

In order to add a new theme to your WordPress installation, please follow these basic steps:
  1. Download the zip package of the theme in ThemeForest
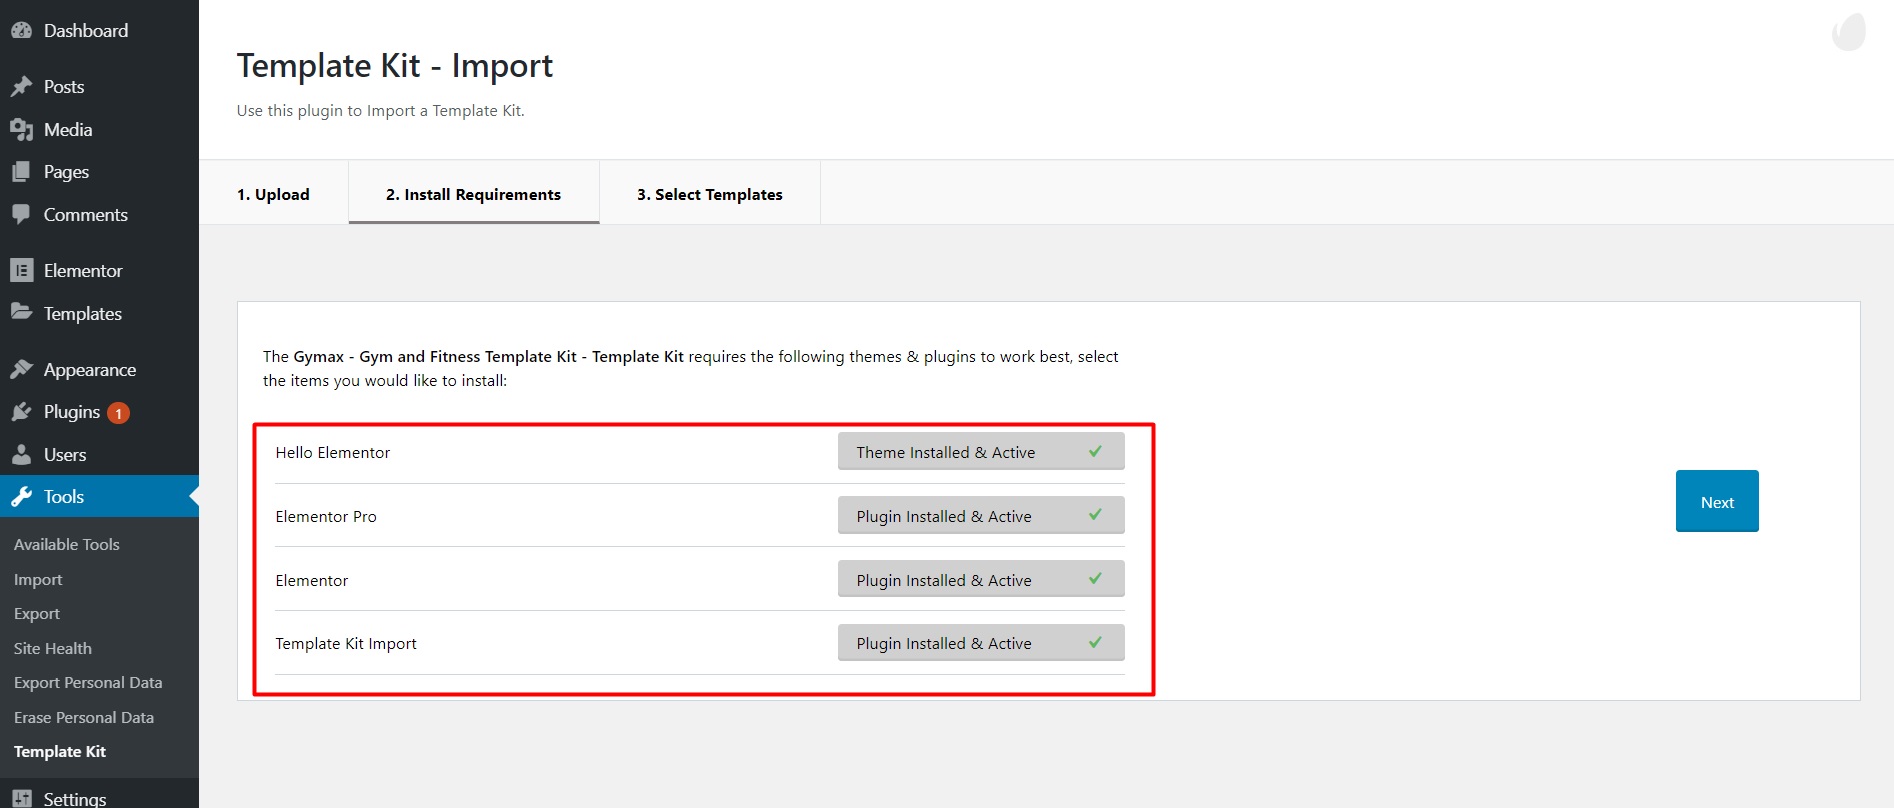
  2. Install “hello themes” and plugins, then activate them:
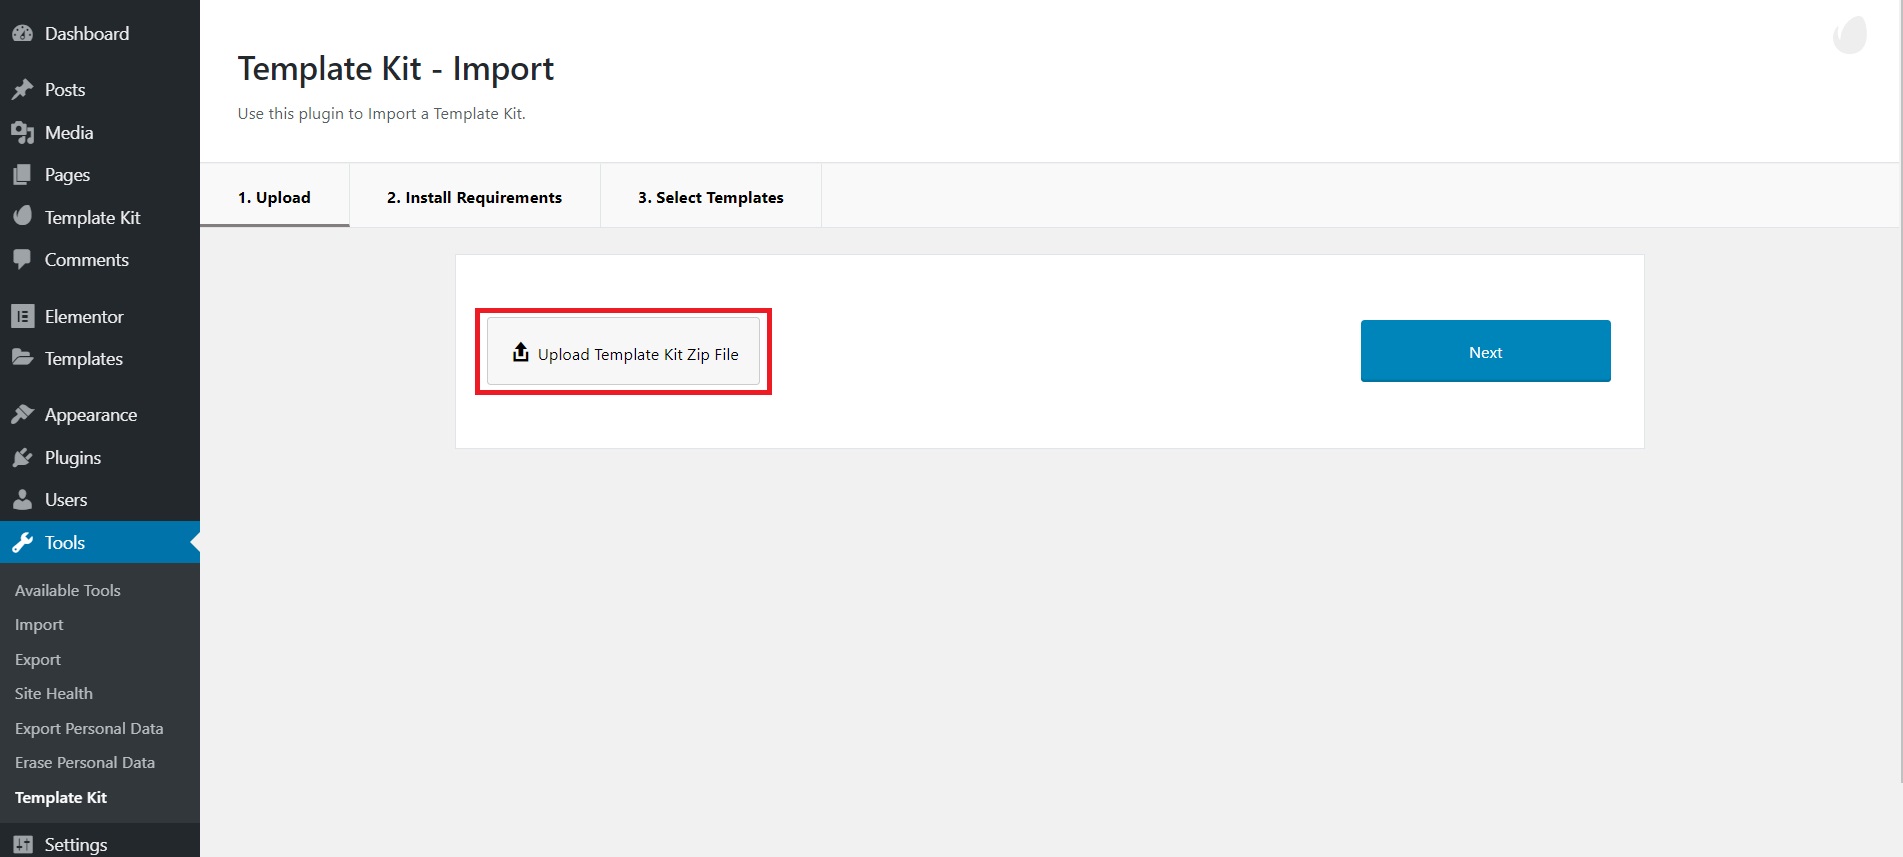
  3. Open WordPress admin panel (e.g www.your_domain.com/wp-admin/) and go to Tools > Template Kit on admin sidebar and click ” Upload Template Kit Zip File” button.
  4. Upload zip package of the template which you can find inside files folder and click ‘Next’ to install the template.
  5. Continue to click “next” to move to the next step( Install the theme and plugins as in step 2 already done ).
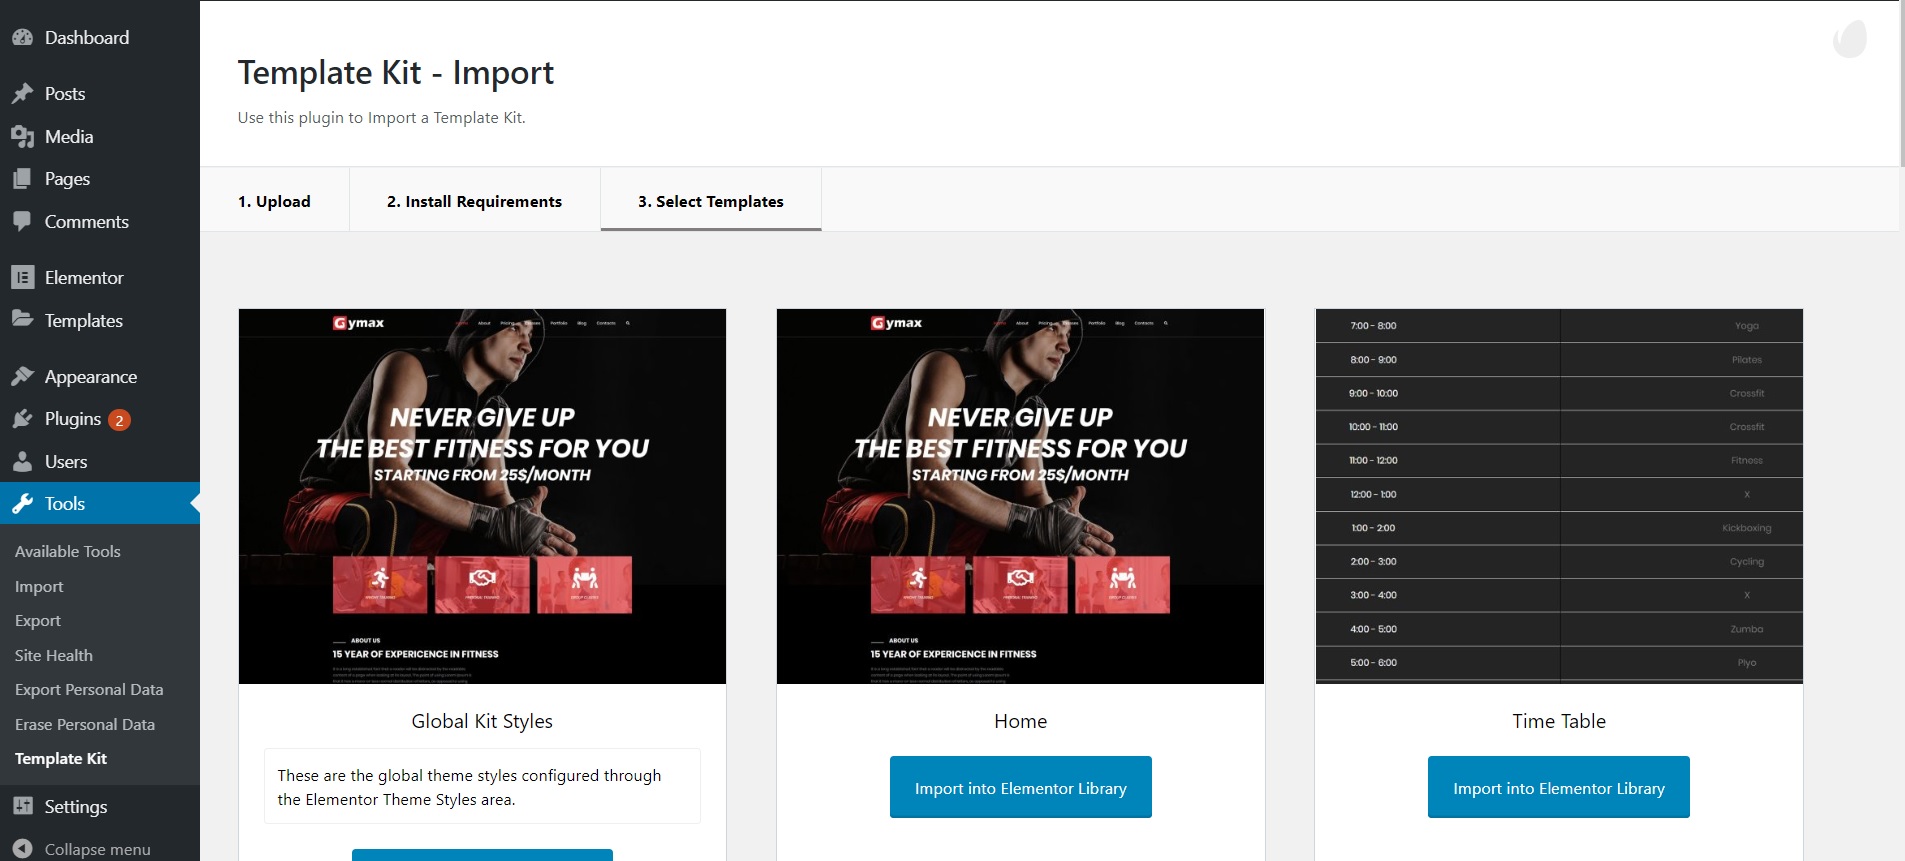
  6. Continue to click “next” to move to the next step.
    Click the “Import to Element Library” button to begin the process of installing the templates. (We recommend all templates to get the same interface as our demo.)
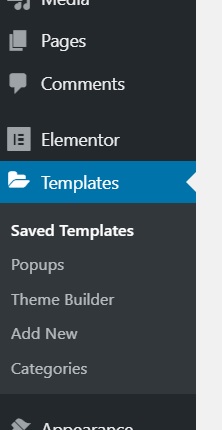
  7. After importing the demo is complete your go to Templates on admin sidebar. Here you will see the installed demos.
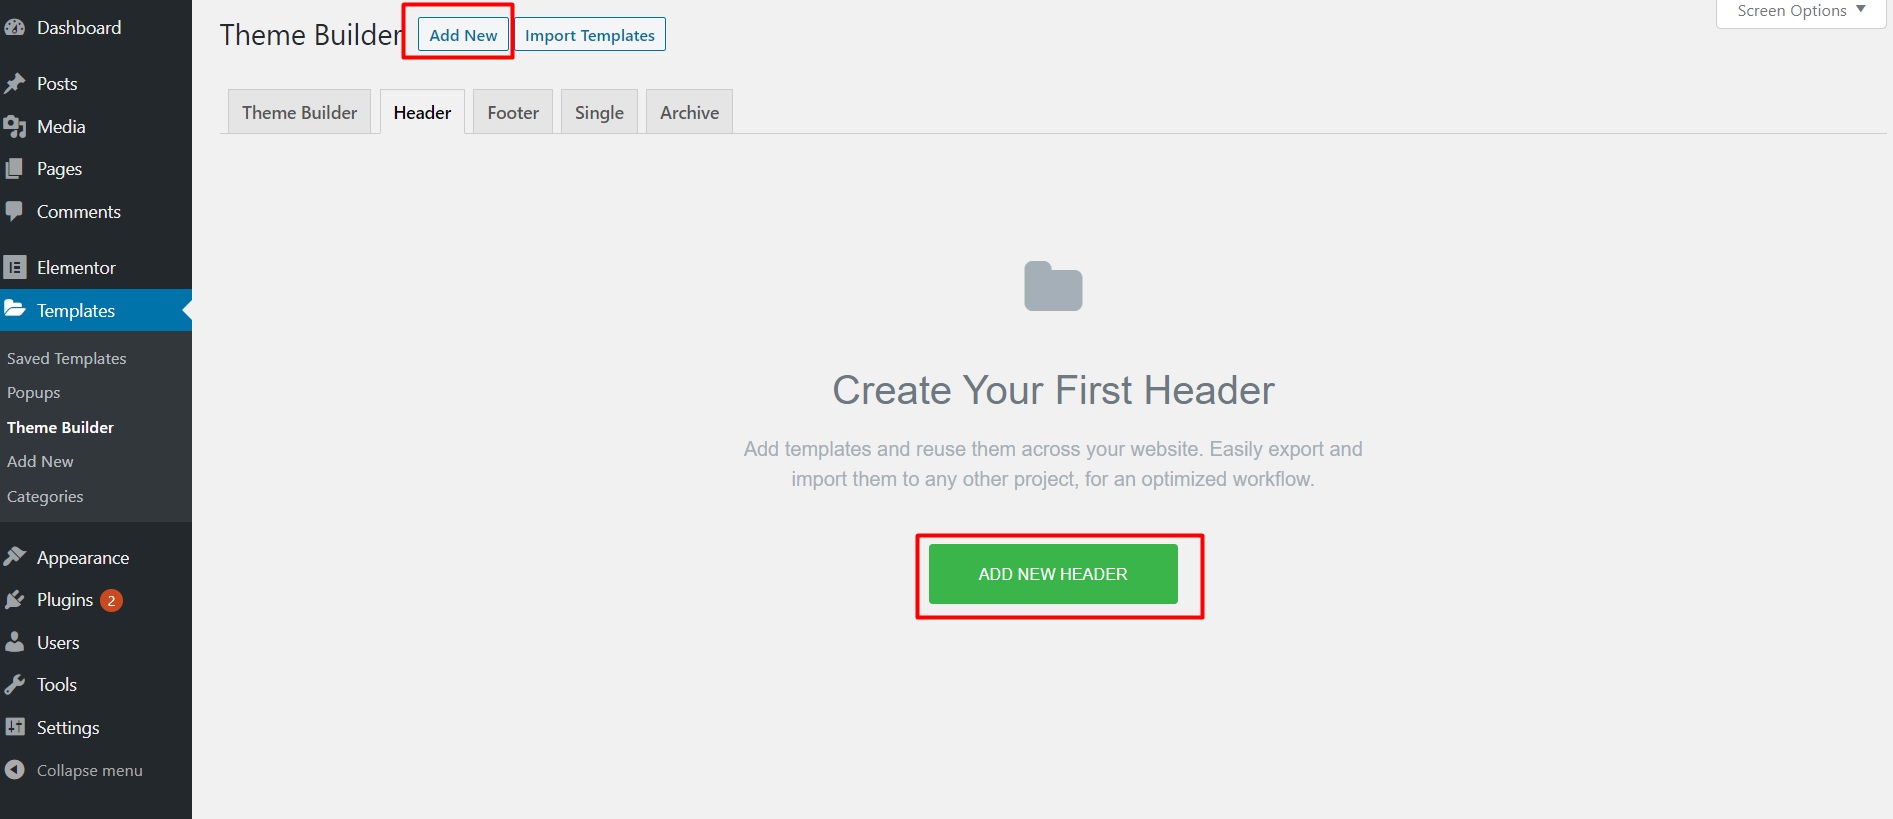
  8. Set up Header and Footer. Your go Theme Builder > Header(Footer).  Link video.
    The Header has 2 layers: 1 for the homepage and 1 for single posts(However Footer will be used for all).
      • Click “Add new”.
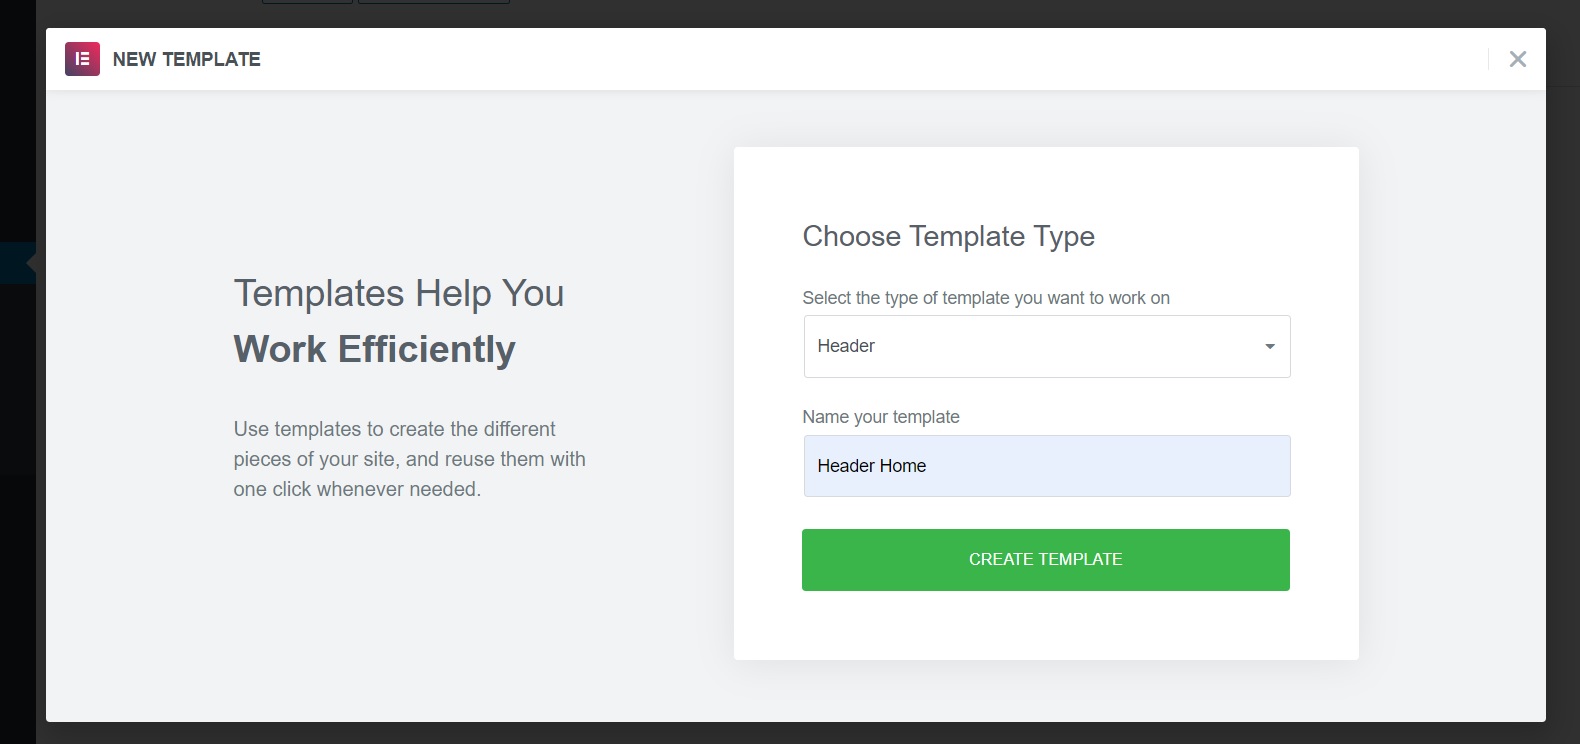
      • Then select the types and name it “header”. Next click on the “Create template” button.
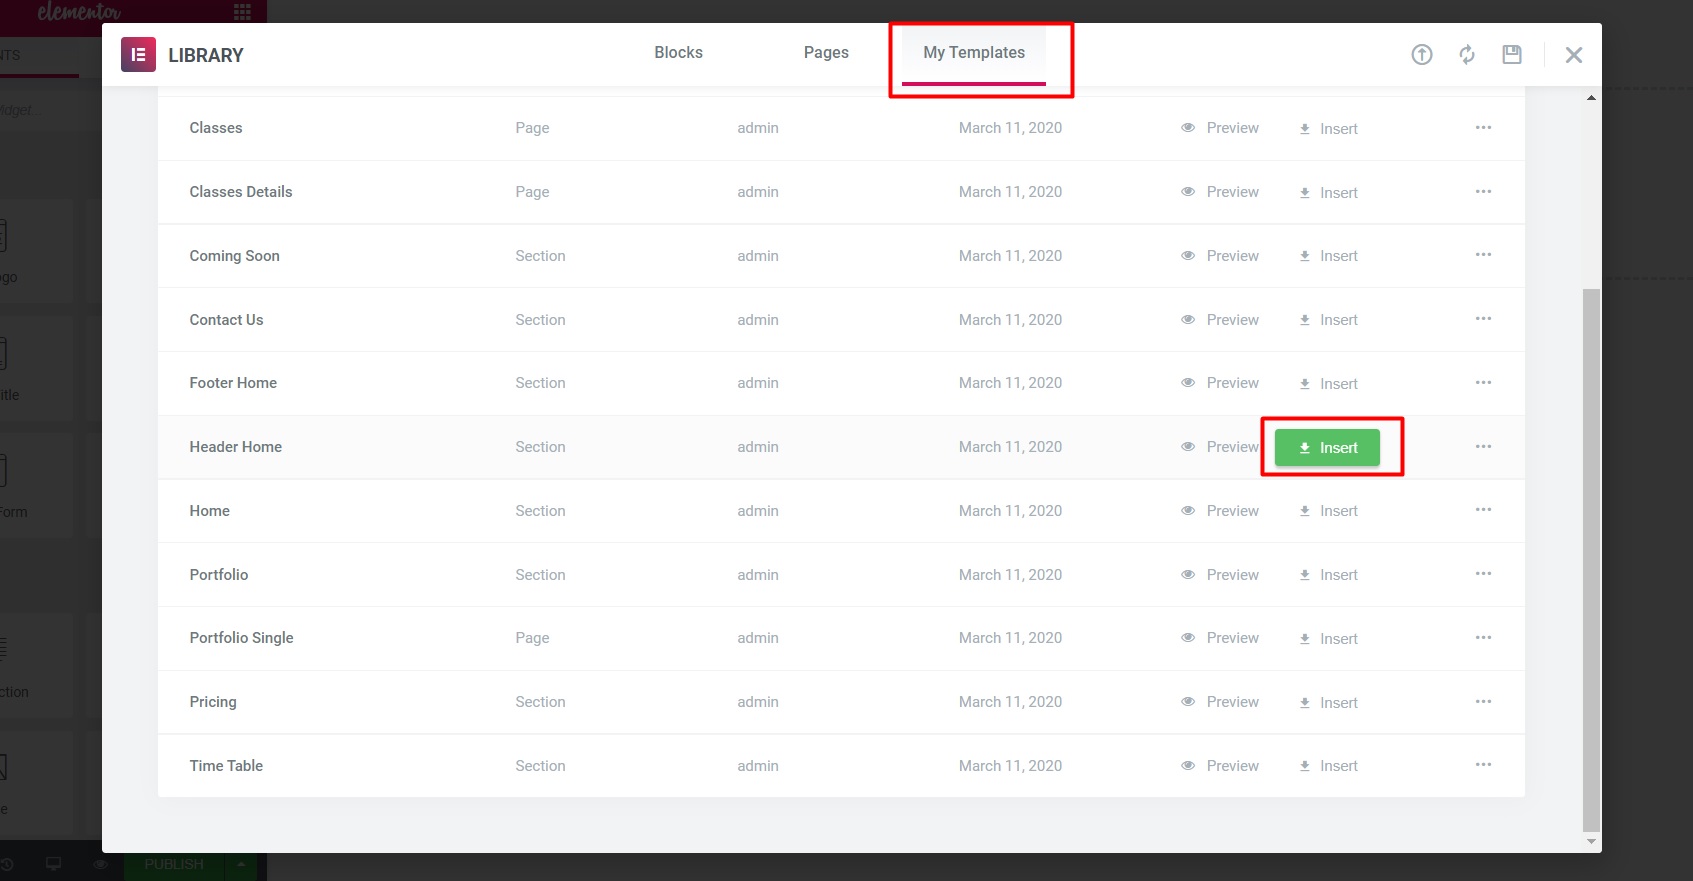
      • In the next interface select “My template” then go to “Header Home” and click “Insert”.
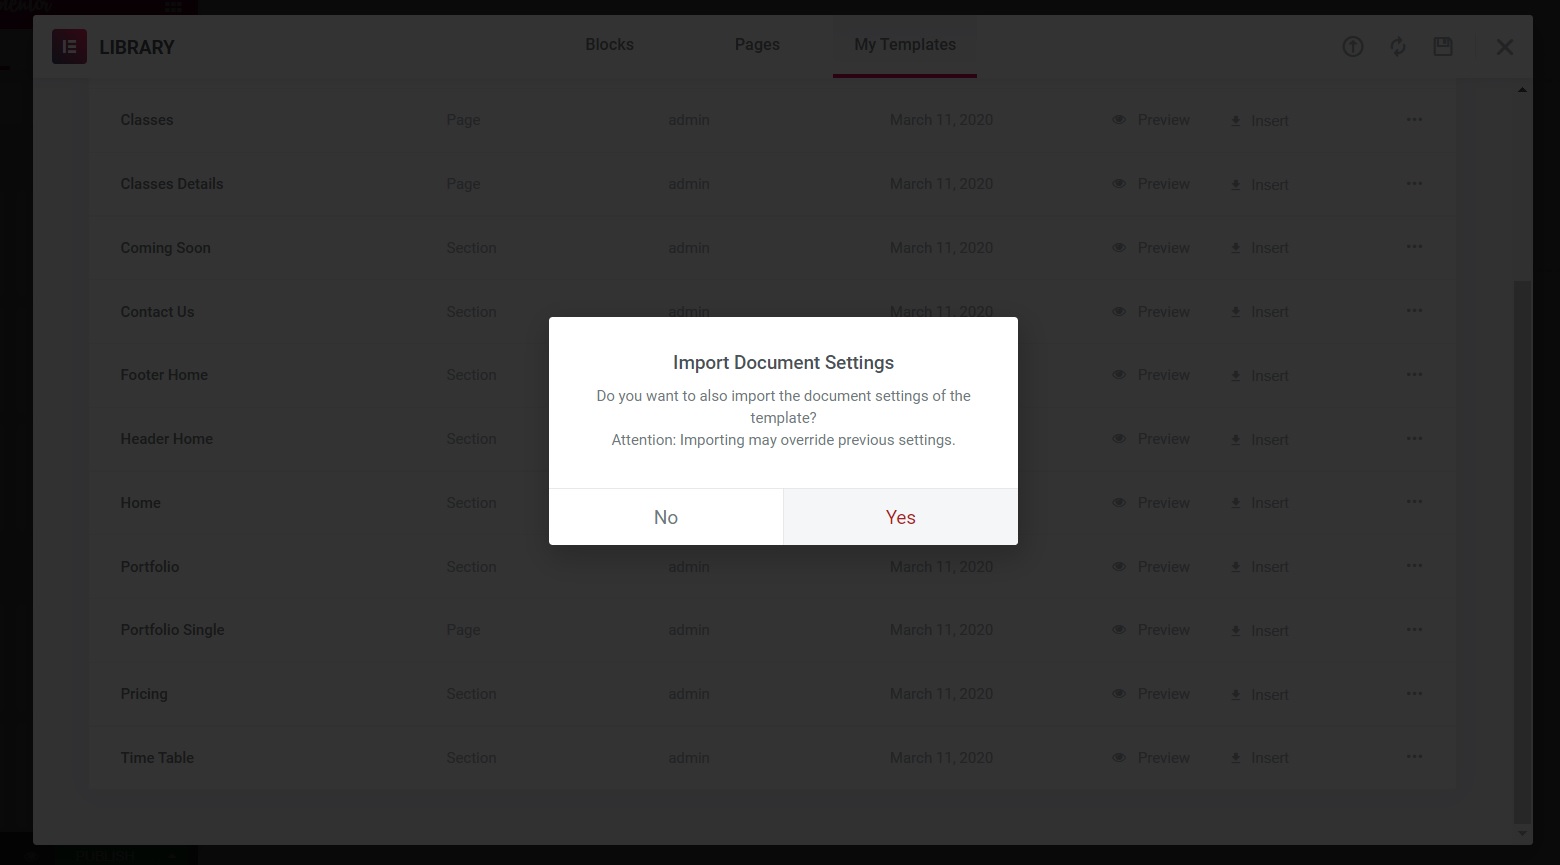
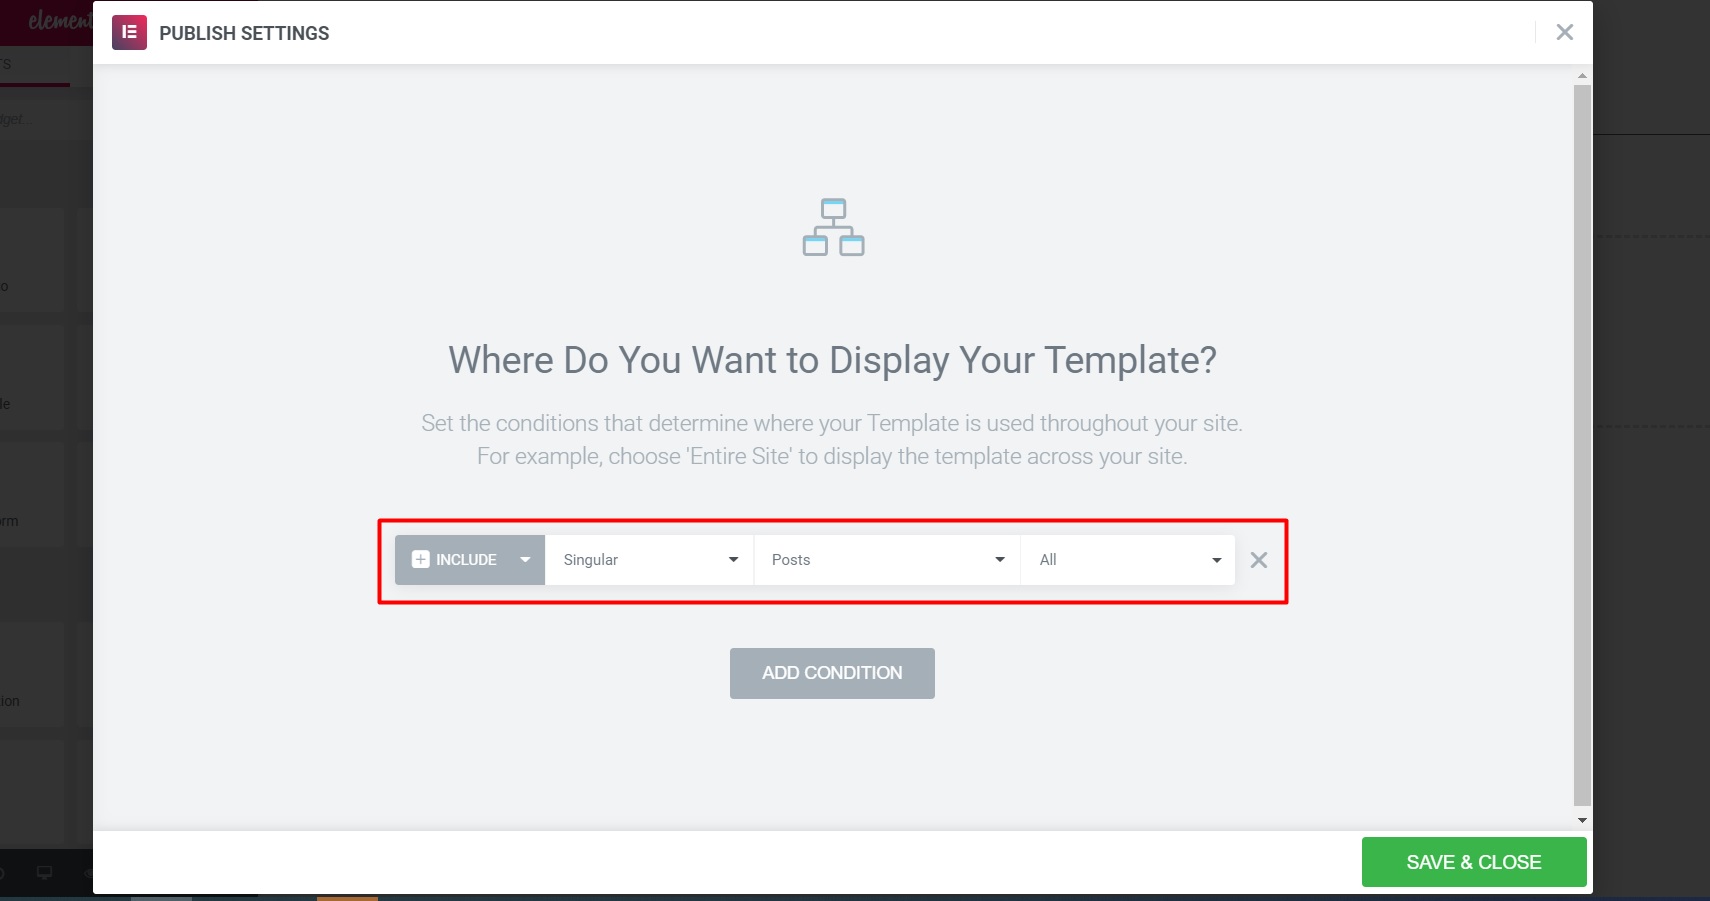
      • Select “yes” to enter the form in the Header content.
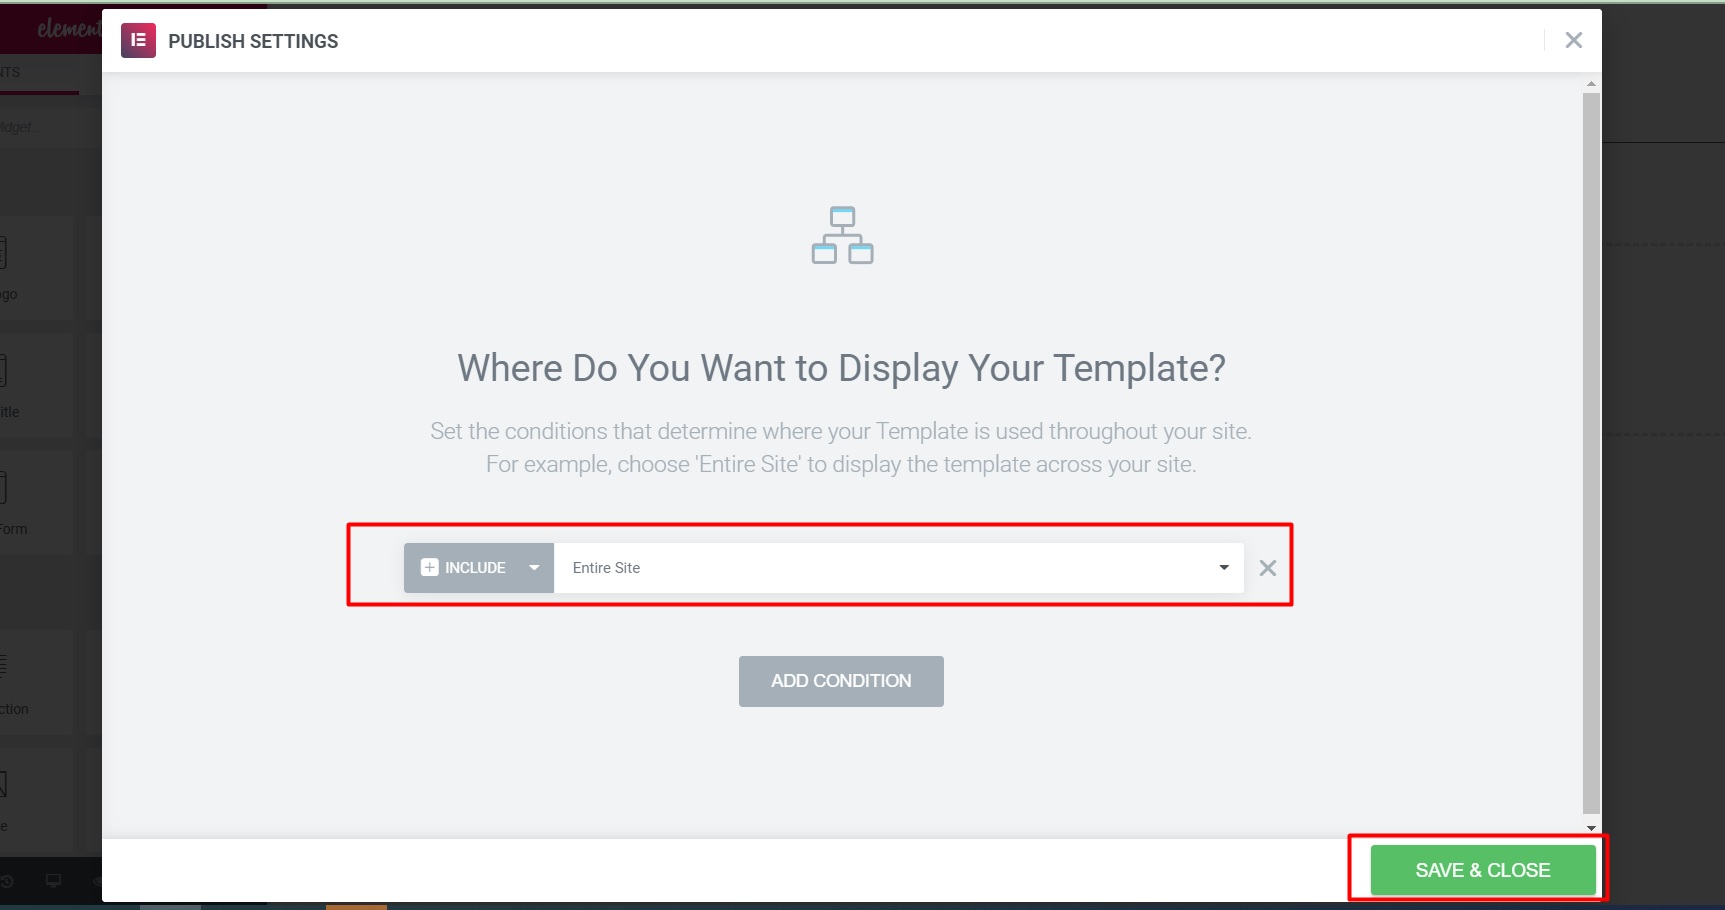
      • Click “yes” then click “Save & Close”.
        Header homepage
        Header post single
      • So you have completed the process of creating “Header”. For “Footer” you do the same.

    NOTE: If “Header” is hidden, do the following:
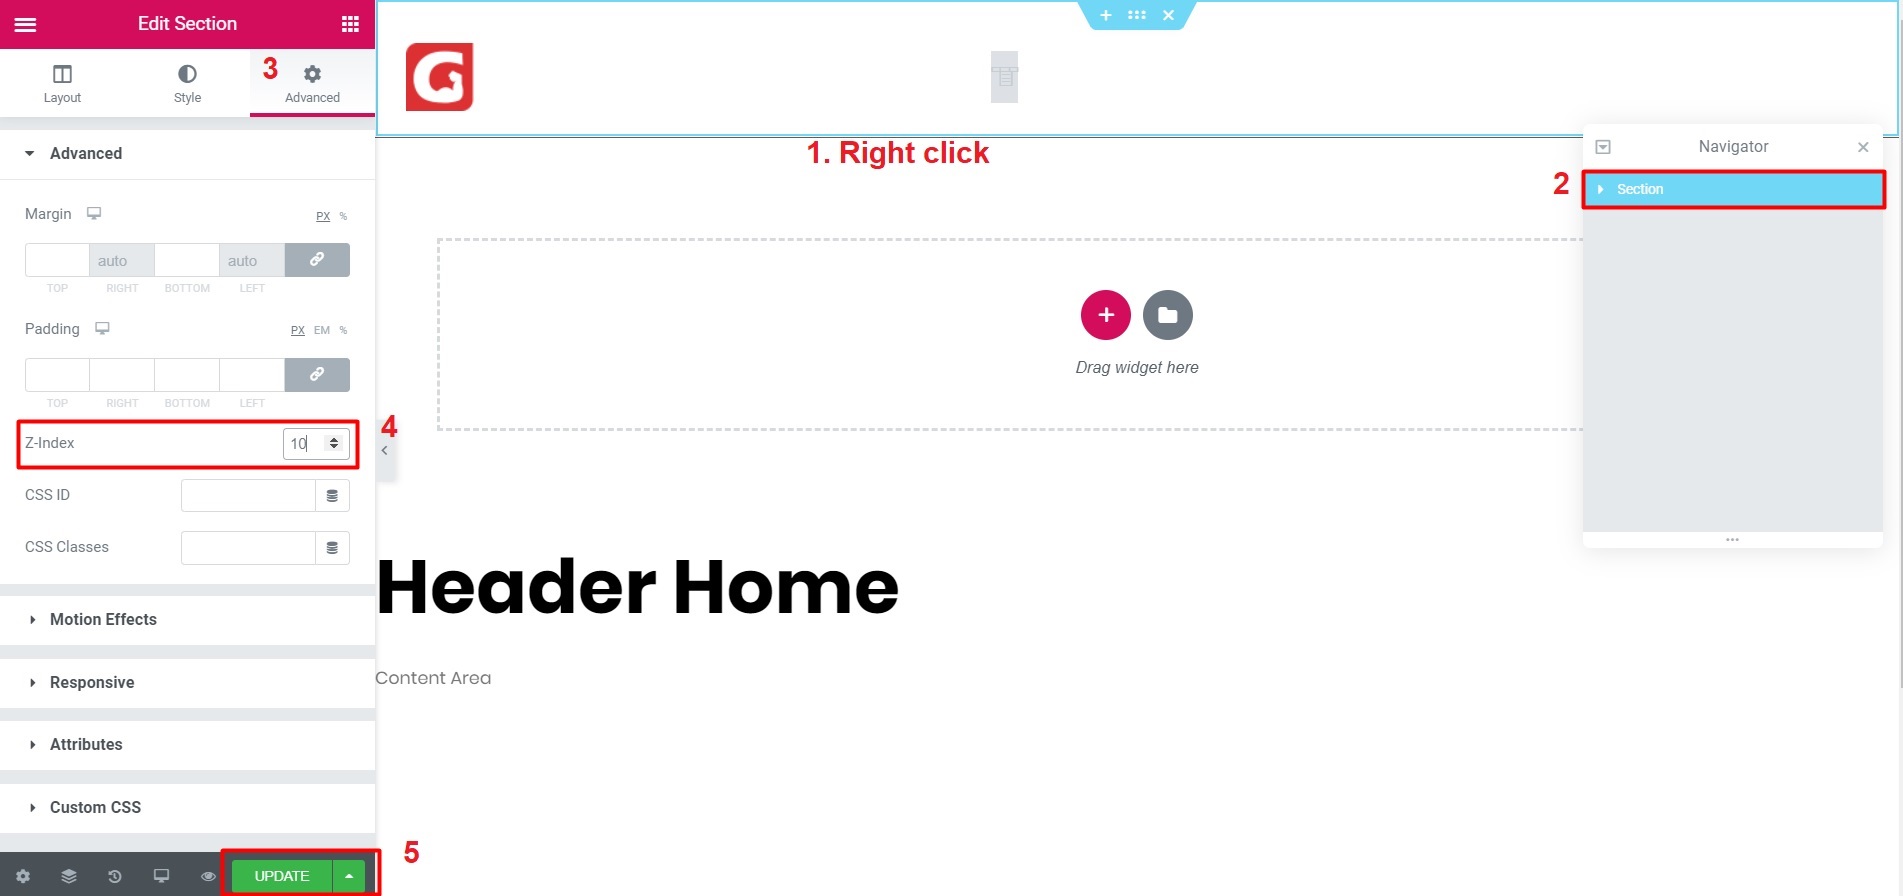
  9. Set up Pages.
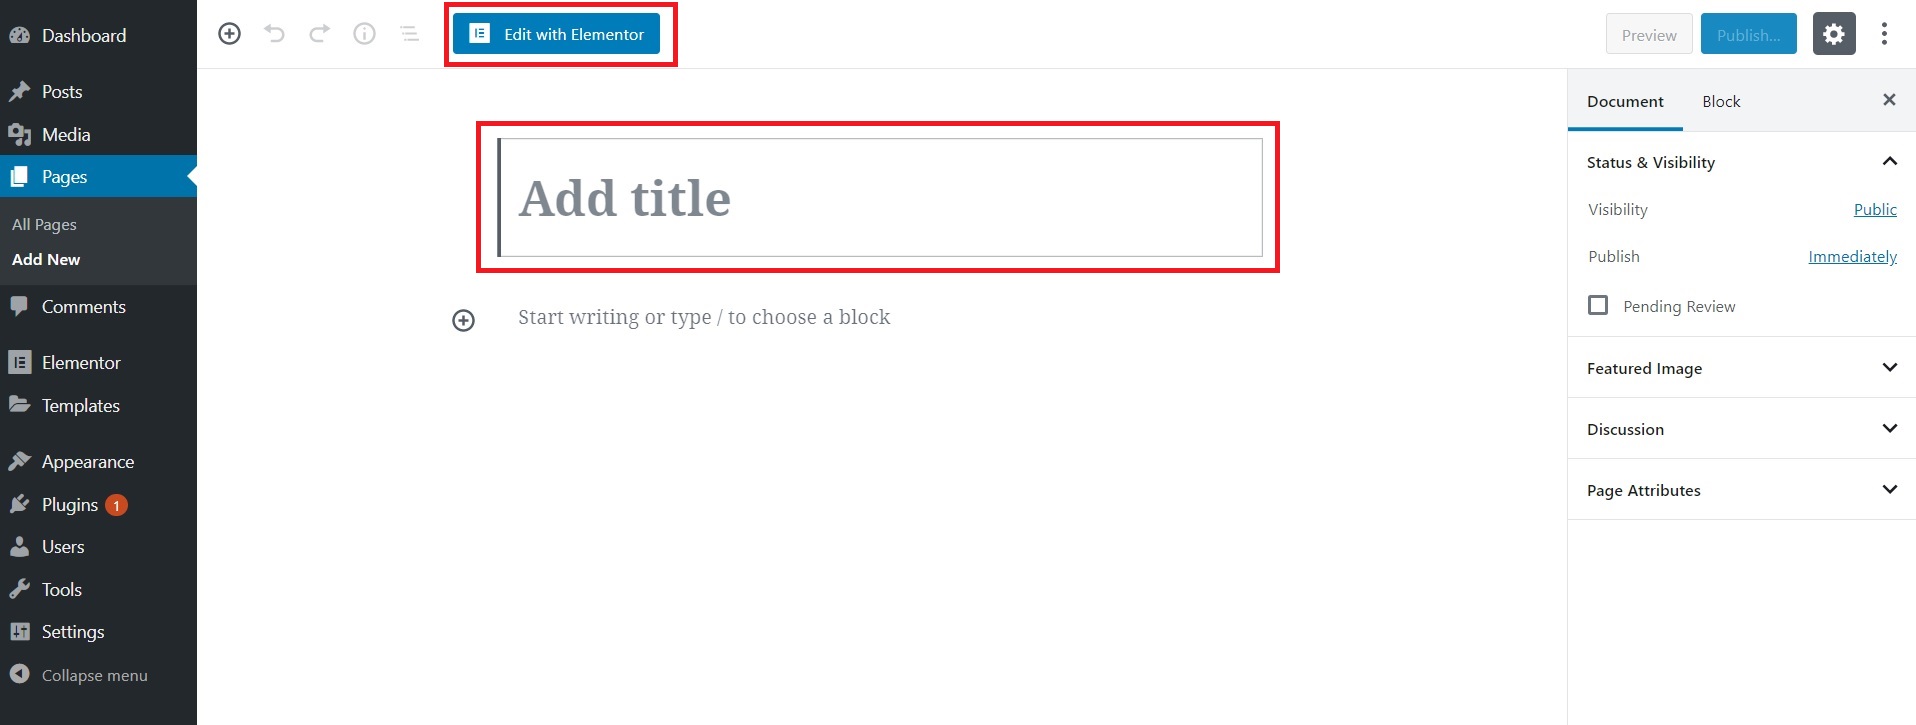
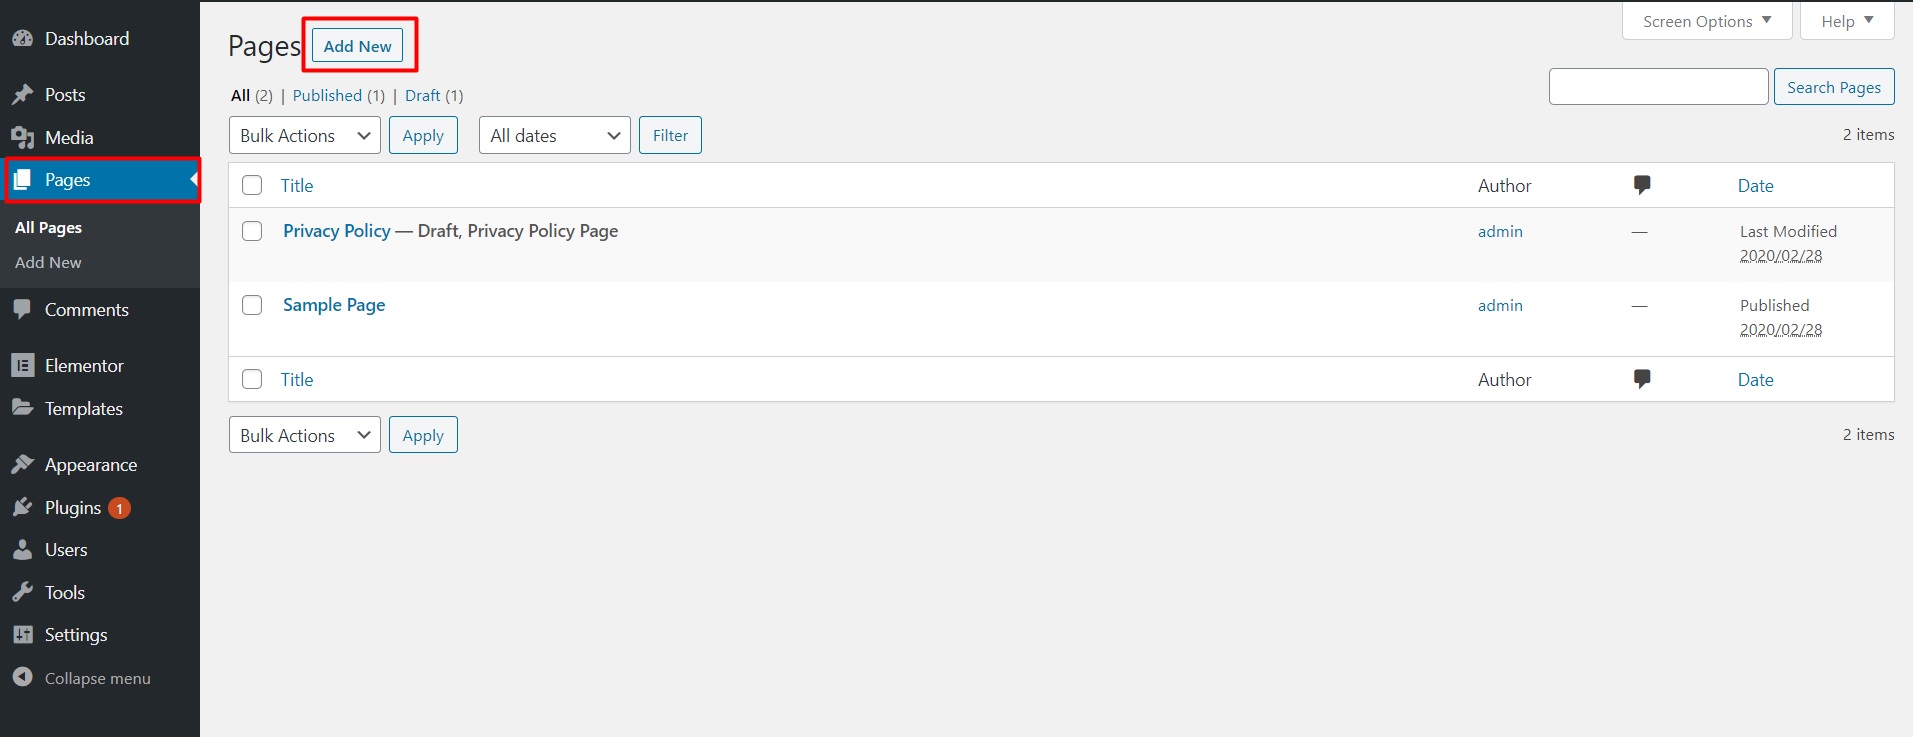
    • Your go to Pages on admin sidebar. Click “Add new”.
    • Enter page name then click “Edit with Elementor “.
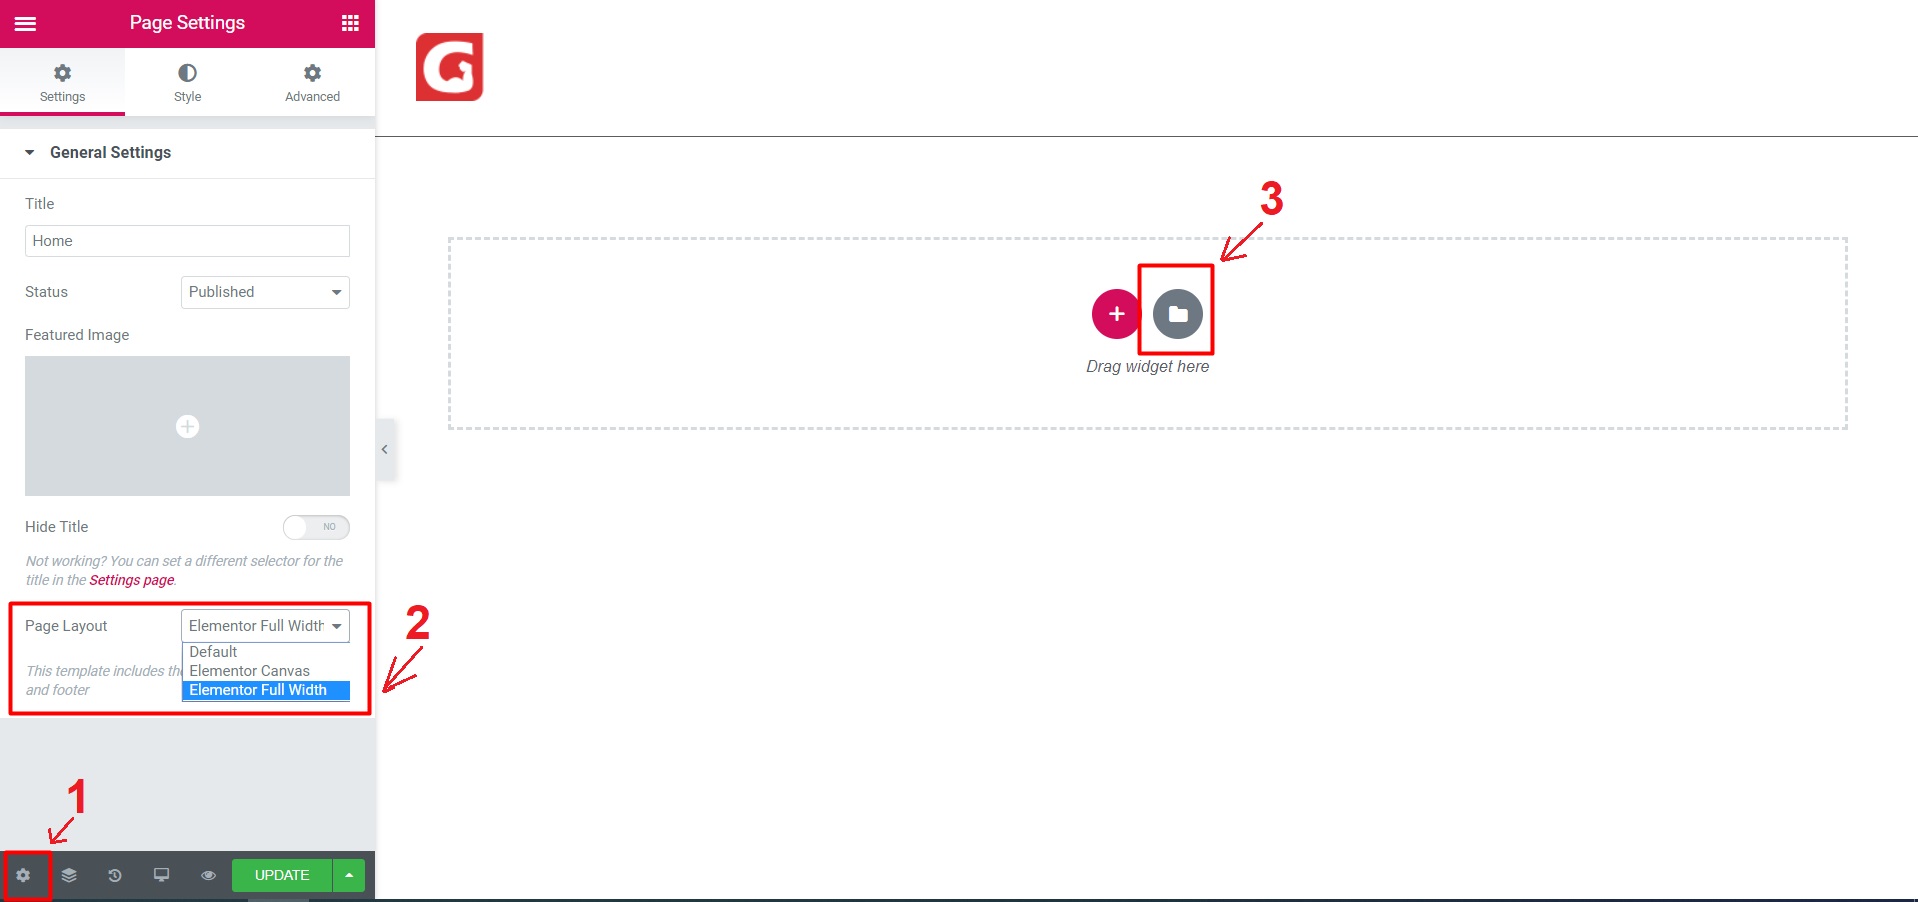
    • Next
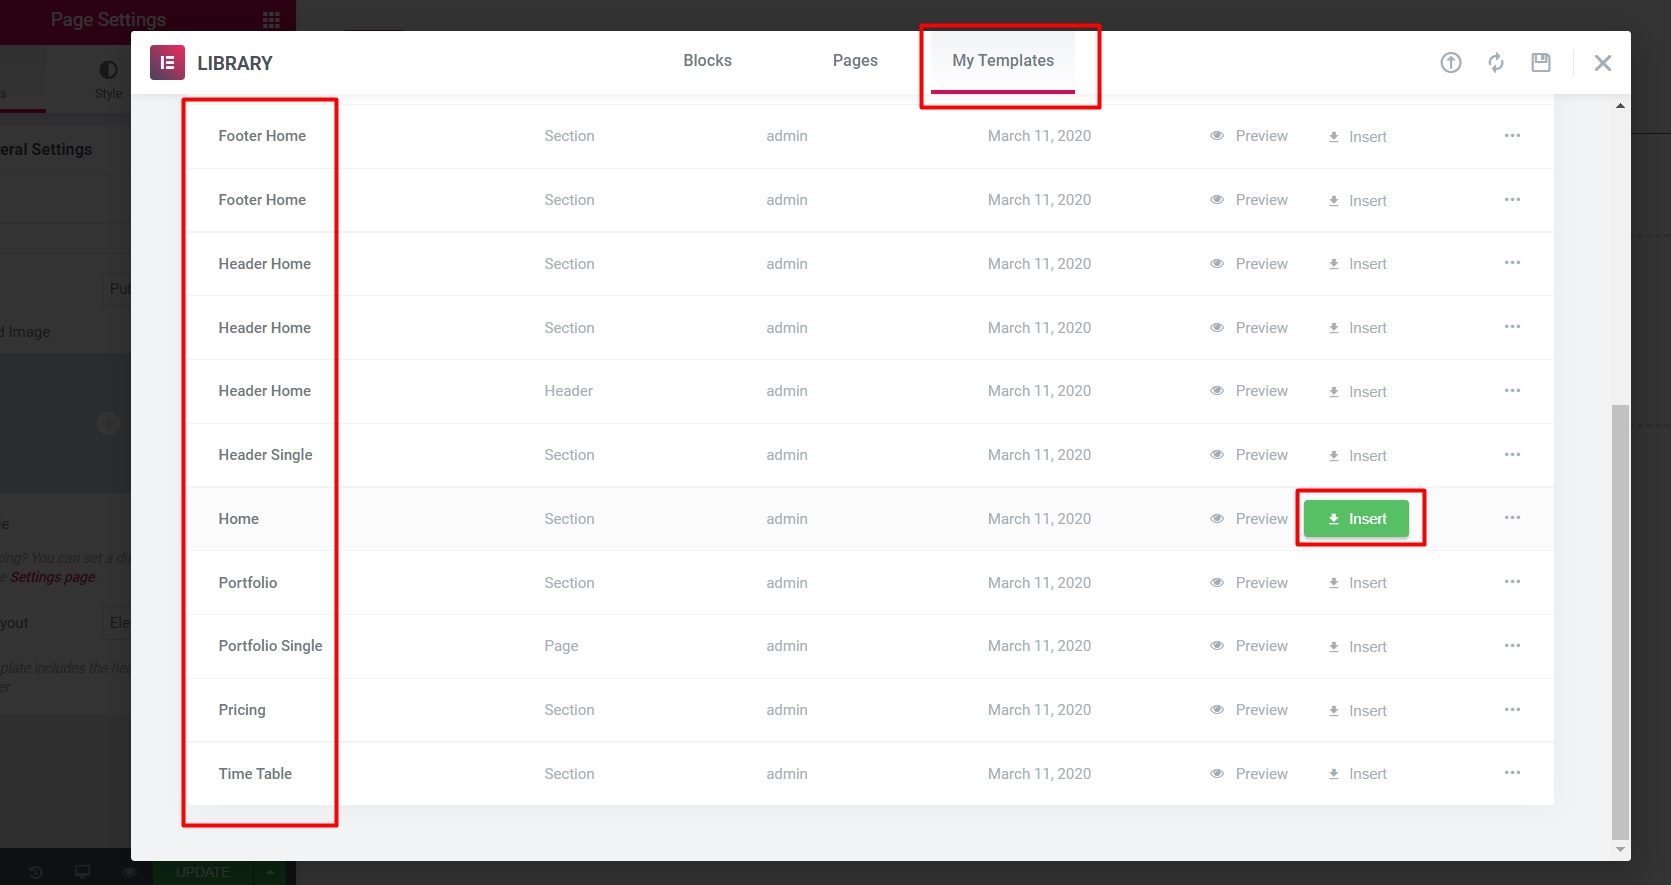
    • Next select “My Template” find the page you want, then press “Insert” and click “yes”.
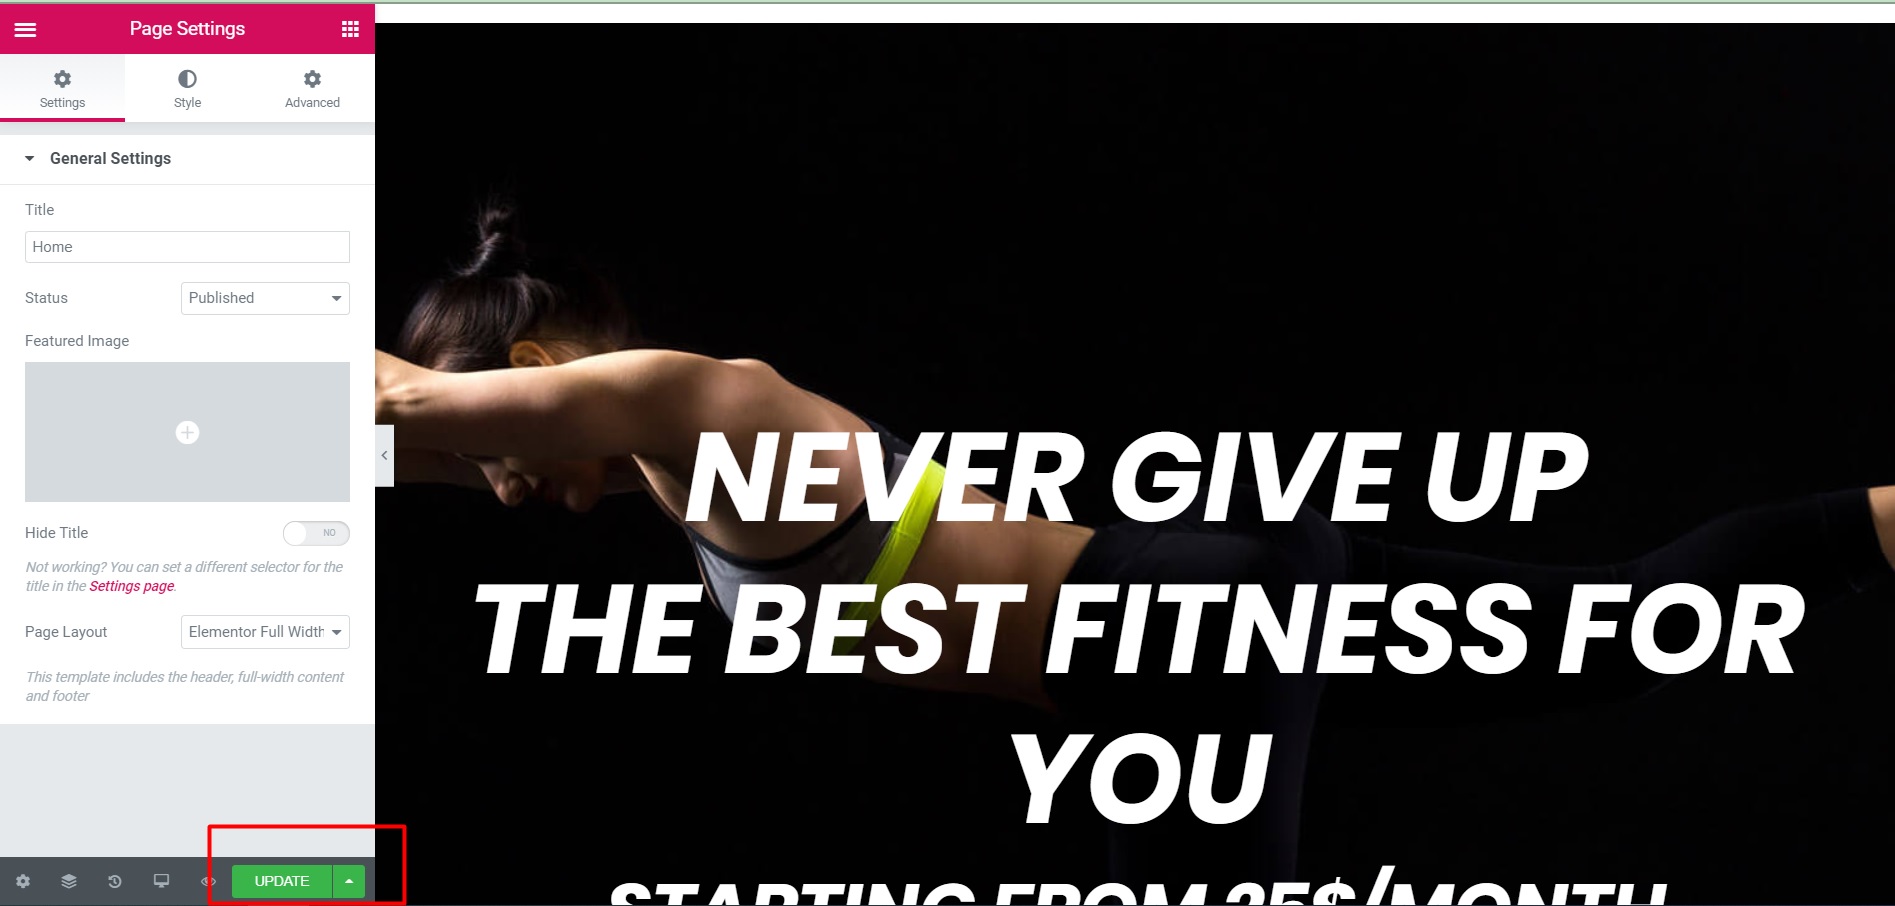
    • Click “UPDATE”  to save.
    • So you have completed the process of creating “Page”.
  10. Cart and checkout
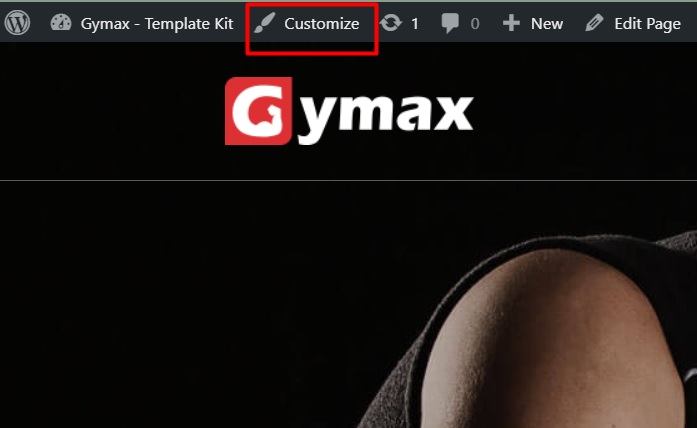
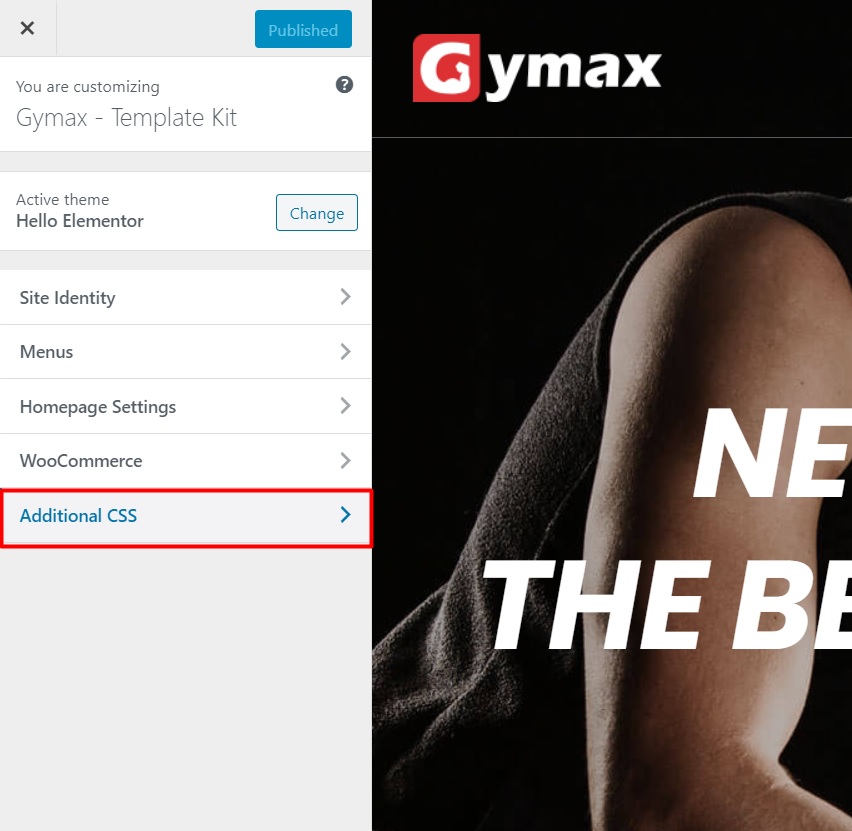
    • Download the style file here. Then you coppy.
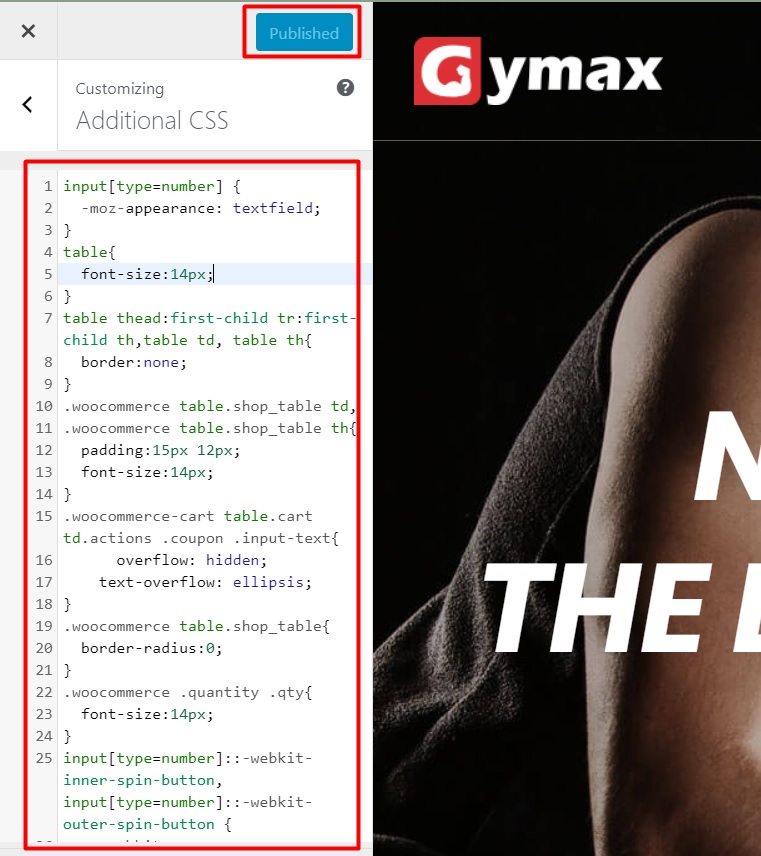
    • You paste it here and press “Published”:

If you don’t find the answer for your issues in this document and you want to contact us for support, please contact us by creating new topic in our website ArrowPress Support Site or send an email to our email [email protected]